Anatomy Flashcards: Hide the Label, Not the Picture
The best anatomy flashcards use image occlusion: you take a labeled diagram, hide one label, and ask yourself to name the hidden structure. Each label becomes its own card. Pair these picture cards with short text cards for function, nerve supply and blood supply, and review them on a spaced schedule.
Anatomy is a visual subject that students often study with words. You write Supraspinatus: above the spine of the scapula on a card, learn it perfectly, and then freeze when a practical exam points a pin at a muscle and asks what it is. The problem is not effort. It is format. Good anatomy flashcards show you the picture and hide the name, because that is exactly what the exam does. This guide shows you how to build them, which facts still belong on text cards, and what research says about testing yourself in anatomy.
Why do text-only anatomy cards fall short?
Because most anatomy exams start from an image, a model or a specimen and ask for the name. Text cards train the reverse path, from a name to a description. You need practice going from location to name, which only a picture-based card provides.
Memory depends on the cue you practiced with. If every review starts with a written word, the written word is the cue your brain learns to respond to. In a lab practical the cue is a shape in a particular position next to other shapes. Picture cards let you practice with the same kind of cue you will meet on test day. They also lean on dual coding, the idea that words plus images give you two routes back to a memory.
What is image occlusion?
Image occlusion means covering part of a diagram, usually one label, and asking yourself to name what is underneath. Piotr Wozniak, who called it graphic deletion, notes that a single illustration can produce 10 to 20 separate cards, one for each hidden part.
Wozniak describes the method as rule eight in his twenty rules of formulating knowledge and calls it as good as fill-in-the-blank cards for text. Most flashcard apps now offer an image occlusion tool, and you can do the same thing on paper with sticky notes over a printed diagram.
How to build image occlusion anatomy flashcards
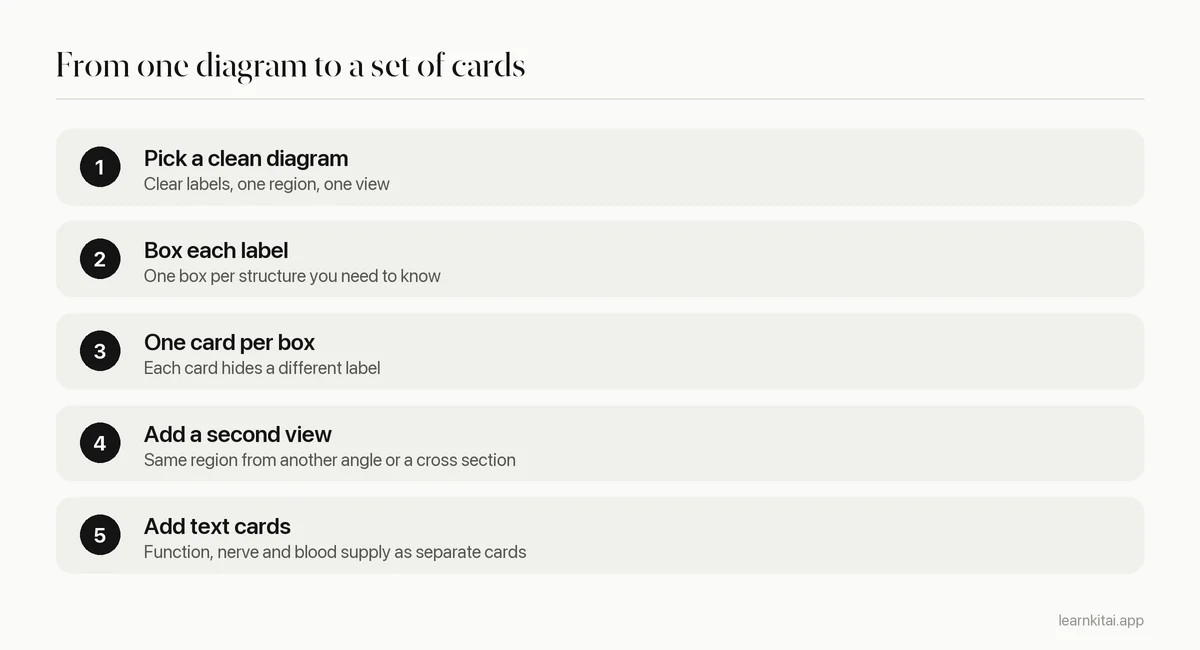
- Use the figures your course uses. If your professor tests from a specific atlas or lecture slide, card those images. Keep them for personal study.
- Skip labels you will not be tested on. A diagram with 40 labels does not need 40 cards.
- Mix views. Learn the brachial plexus from at least two diagrams, so you recognize the structure, not the picture.
- Add real images later. After a region feels solid, add cards from cadaver photos, models or radiographs if your course uses them.
Which facts belong on text cards instead?
Anything that is not visible on a diagram: actions, nerve supply, blood supply, attachments and clinical links. Write each as a short text card that starts from the structure and asks for one fact. Keep them separate from the picture cards so you can tell which skill is weak.
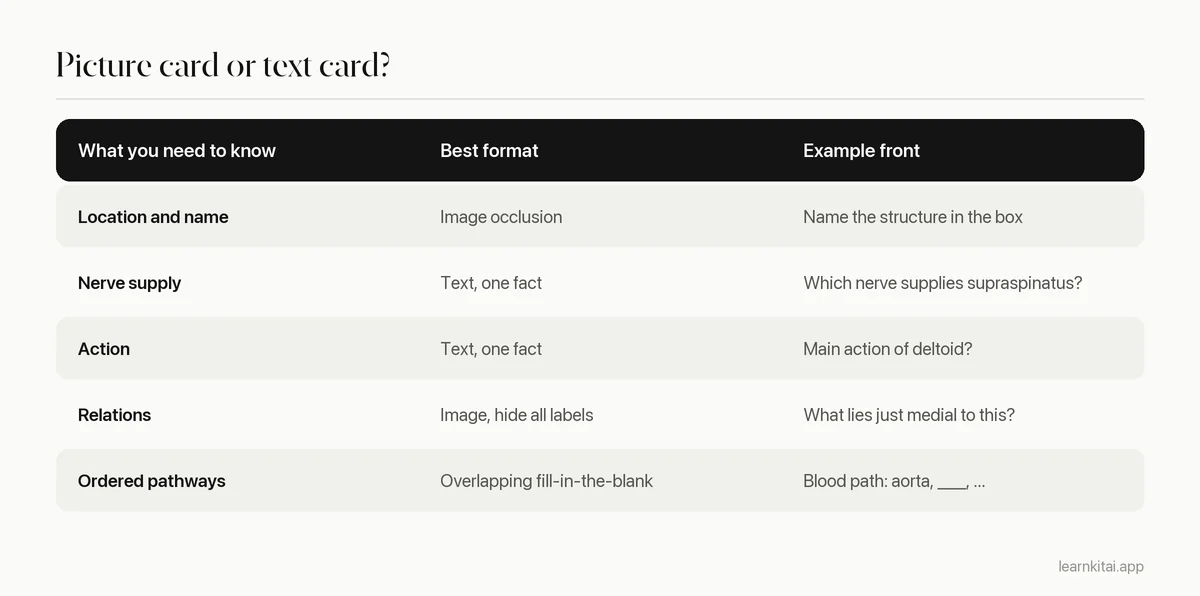
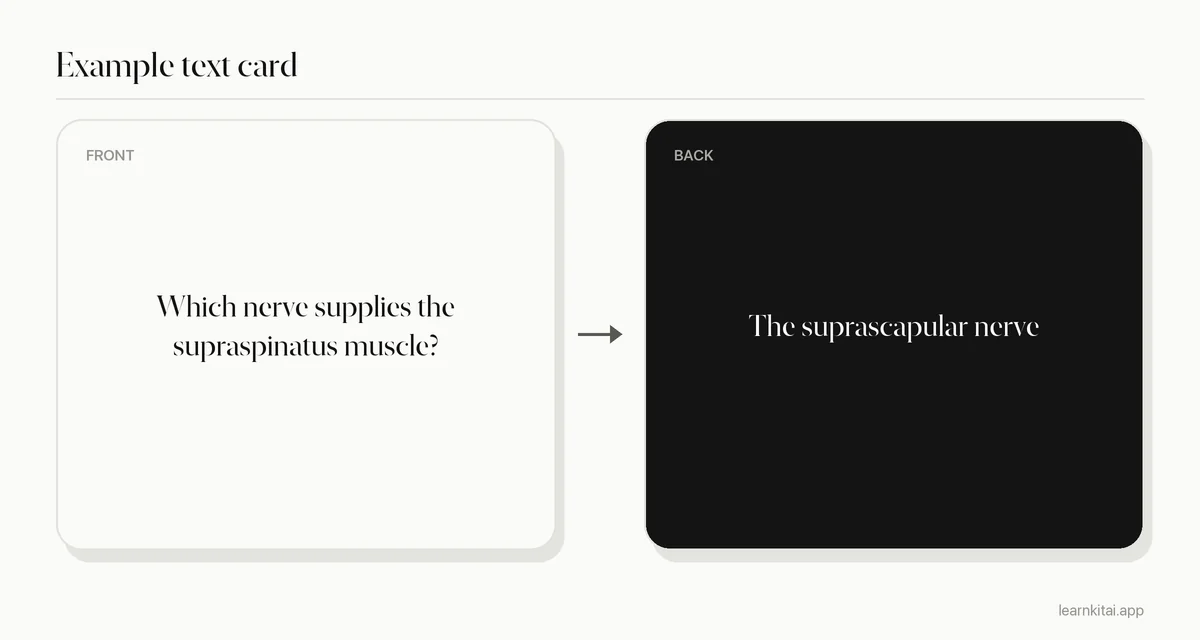
Notice that the card asks for one fact. A card that asks for origin, insertion, action, nerve and blood supply at once is five cards pretending to be one, and you will grade it generously every time. The reason is explained in the minimum information principle.
Does testing yourself really help in anatomy courses?
The evidence says yes. In a 2013 anatomy and physiology class study, students who took ten short retrieval quizzes, about two hours in total, retained on average 41% more of the quizzed material at the end of the semester than a control group.
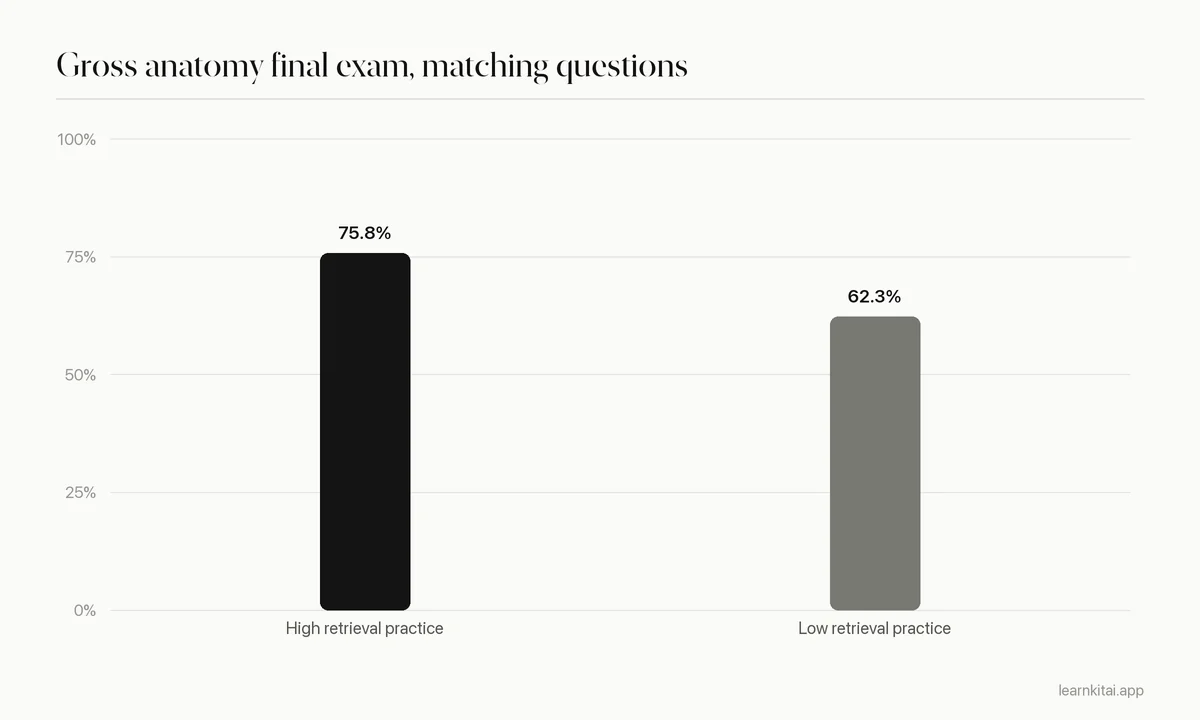
That study, by John Dobson, was published in Advances in Physiology Education and ran inside a real course rather than a lab. A later gross anatomy study at Queen's University found a similar pattern: students who took part in at least 85% of in-class retrieval practice averaged 75.8% on matching final exam questions, versus 62.3% for students who took part less. That second study was not randomized, so motivation may explain some of the gap, as the authors note.
How should you schedule anatomy reviews in a busy week?
Add one region at a time, in step with your lectures, and review a little every day instead of a lot once a week. Spend most of each session on cards that are due, then add new picture cards for the region you just covered in class.
Anatomy courses move fast and every week brings a new region. If you only review the current region, the earlier ones fade by the time the cumulative practical comes around. Keep every region in one deck and let spaced repetition bring old structures back as you add new ones. A realistic weekly rhythm looks like this:
- After each lecture or lab: build picture cards for the structures covered that day, then answer them once.
- Every day: clear the cards that are due before adding anything new. Keep the session short enough that you never skip it.
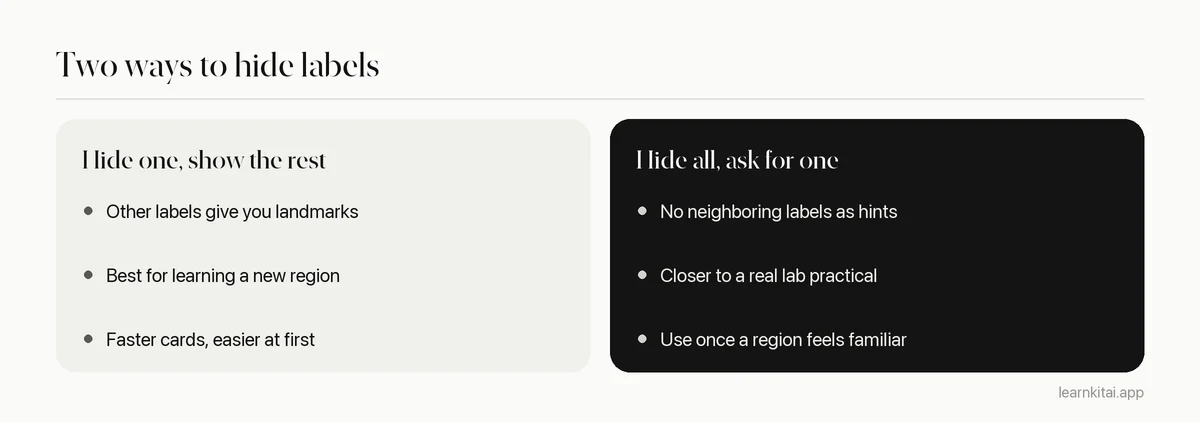
- Once a week: switch a familiar region from hide-one to hide-all cards, so you lose the help of neighboring labels.
- Two weeks before the practical: stop adding cards from new sources and focus on the structures you keep missing.
Daily reviews also help with the strange feeling that you know a structure in the app but not in the lab. When you miss a card in the lab, make a new card from that exact view. Over a term, your anatomy flashcards turn into a record of every place you were once confused.
Common mistakes with anatomy flashcards
- Learning every structure from a single diagram, then failing to recognize it from another angle.
- Making cards for every label in an atlas instead of what your syllabus covers.
- Cramming a region the night before a practical. Anatomy has too many similar names to survive cramming.
- Never mixing regions. Interleave the upper limb with the lower limb so similar structures stop blurring.
- Skipping the why. Knowing that a nerve supplies a muscle is easier when you know where the nerve runs.
For the text side of your deck, an AI tool can save time. LearnKit can turn a photo of a textbook page or your lab notes into short flashcards and quiz questions about function and supply, which you then check against your course material. The picture cards are best built by hand in an image occlusion tool, because choosing which labels matter is part of the learning.
Picture cards for names, text cards for facts, short daily reviews and plenty of mixing between regions: that combination covers most of what an anatomy course asks of you. For a full plan beyond flashcards, read how to study anatomy, and for general card-writing rules see how to make effective flashcards.
Frequently asked questions
Should I make my own anatomy cards or use a premade deck?
Premade decks save time but rarely match your course exactly, and you skip the useful work of deciding what matters. A common middle path is to use a shared deck as a base, suspend what your course does not cover, and add your own picture cards from the figures your professor uses.
How do I learn similar-looking structures without mixing them up?
Make a card that asks you to tell them apart directly, such as a diagram with both visible and a question about which is which. Interleave regions in your reviews too, so similar structures come up close together and your brain has to discriminate.
Are mnemonics useful for anatomy?
They help for ordered lists like cranial nerves or carpal bones. Use them sparingly and put the mnemonic on the back of a card as a hint, not as the thing you memorize instead of the structures themselves.
Sources
- Retrieval Practice Is a Efficient Method for Enhancing the Retention of Anatomy and Physiology Course Information, Advances in Physiology Education (Dobson, 2013), via Georgia Southern University Digital Commons (Ten brief retrieval quizzes totaling about 2 hours; retrieval groups retained an average of 41% more of the quizzed material.)
- Retrieval Practice for Improving Long-Term Retention in Anatomical Education: A Quasi-Experimental Study, Medical Science Educator (Azzam and Easteal, 2021), PubMed Central (248 gross anatomy students; high participation in retrieval practice averaged 75.8% vs 62.3% on congruent final exam questions.)
- Effective learning: Twenty rules of formulating knowledge, SuperMemo (Piotr Wozniak, 1999) (Rule 8, graphic deletion: one illustration can yield 10 to 20 items.)
Keep reading
How to Make Flashcards That Still Work Three Weeks Later
Most flashcards fail before you ever study them, because of how they are written. Seven rules, real before and after cards, and a study routine that keeps them working.
How to Study Anatomy: Learn the Map Before the Streets
Anatomy feels like thousands of names. Learn the layout first, decode the Latin, and test yourself with images, and it starts to fit together.
Minimum Information Principle: Small Cards, Big Recall
One flashcard, one fact. Here is why splitting fat cards into tiny ones makes reviews faster and memories stronger, with worked examples.
Cloze Deletion: Fill-in-the-Blank Cards Done Right
Cloze cards are the fastest way to turn notes into flashcards, and the easiest to get wrong. Rules, examples and the exact Anki syntax.
Dual Coding: Pair Words With Pictures to Remember More
Your memory has a verbal channel and a visual one. Use both and ideas get two routes back. How to dual code your notes, with formats for every kind of topic.